Using DKIM with Postfix on Debian
There are plenty of guides to installing OpenDKIM online but they tend to differ quite a bit. It took me a while to work out which steps were necessary and which seemed most like the Debian way.
Assumptions
These instructions are written assuming that you use:
- Debian 9 (Stretch)
- Postfix as your only MTA, and
- packages from the Debian repositories.
If any of these do not apply, I recommend referring to the OpenDKIM Readme, the Arch Wiki, or something more specific to your circumstances.
Installation
Install the OpenDKIM package and tools.
apt-get install opendkim opendkim-tools
This will create opendkim.conf and also the dkimkeys directory for storing private keys where only the opendkim user has access.
ls -l /etc | grep dkim
drwx------ 2 opendkim opendkim  4096 Feb 28 17:28 dkimkeys
-rw-r--r-- 1 root     root      2805 Sep  4 01:17 opendkim.conf
You will need to create some additional configuration files later. Make a new directory for them now.
mkdir /etc/opendkim
ls -l /etc | grep dkim
drwx------ 2 opendkim opendkim  4096 Feb 28 17:28 dkimkeys
drwxr-xr-x 2 root     root      4096 Feb 28 18:01 opendkim
-rw-r--r-- 1 root     root      2805 Sep  4 01:17 opendkim.conf
Generating keys
Now generate a private key for the domain using opendkim-genkey.
opendkim-genkey -t -D /etc/dkimkeys -r -s mail -d allysmith.uk
The options used above are:
- -t
- Add the testing flag to the DNS TXT record. If you don’t add this, mail may be rejected while you are configuring DKIM.
- -D /etc/dkimkeys
- Creates the keys in this directory rather than the current directory.
- -r
- Restricts the key for signing email only.
- -s mail
- Use mail as the selector text. Selectors allow multiple keys under the same domain name e.g. for different servers, departments or users. The text you choose isn’t significant beyond that.
- -d allysmith.uk
- This key is for the domain allysmith.uk.
Some other options you may consider are:
- -b
- To set the size of the key. The default in Debian is 2048 bits but it’s only 1024 bits upstream.
- -h
- To specify the hash algorithms. The default in Debian is rsa-sha256.
This will have created two new files: mail.private and mail.txt. The former is the private key that needs to be kept secret and the latter is a DNS TXT record for your domain which includes the public key.
ls -l /etc/dkimkeys
-rw------- 1 root root 1675 Feb 28 18:42 mail.private
-rw------- 1 root root  511 Feb 28 18:42 mail.txt
Neither private nor public key is domain specific and unless you have used the -a option, the domain name is not part of the DNS TXT record either; it is just added as a comment at the end. That means that you can use the same keys for multiple domains.
If you want to use separate keys for some or all domains then generate aditional keys for them as above. You may want to rename the key files or create subdirectories within dkimkeys for each domain to avoid any name conflicts.
Permissions
You need to make sure that only opendkim has permissions to the private keys. The easiest way is to change the owner and group of the whole dkimkeys directory to opendkim with the -R option, which will apply this recursively to subdirectories and files. Then remove read and write permissions for all other users.
chown -R opendkim:opendkim /etc/dkimkeys
chmod -R go-rw /etc/dkimkeys
ls -l /etc/dkimkeys
-rw------- 1 opendkim opendkim 1675 Feb 28 18:42 mail.private
-rw------- 1 opendkim opendkim  511 Feb 28 18:42 mail.txt
Double check that opendkim owns the private keys and no other groups or users have access.
Publishing the public key
You now have a private key and a public key for your domain. The private key mail.private must be kept secret on your server and the public key mail.txt must be added to a DNS record for your domain. As changes to DNS records take time to propagate over the internet, it is a good idea to add this record now.
File: /etc/dkimkeys/mail.txt
mail._domainkey IN      TXT     ( "v=DKIM1; h=sha256; k=rsa; t=y; s=email; "
          "p=MIIBIjANBgkqhkiG9w0BAQEFAAOCAQ8AMIIBCgKCAQEAz2KBmCdwf/wKxnoZ7JG3km9knGckrmNGhoM4IgOnSt6mOXt7cG5QkHzBW00zCd0gRcbxsTC4D8n/dJ85Op7cQdNo0DOx3RCN1wRG6V5y8niZ1Tpgf2ZrW1f6I1NjbcYEGEp9H5nQizilocaW7F/vqi9uodIF4XELZuvvNwtu+Sb3Xu6cu6O8yI6mTzB53341uJfg9gd/a3aVtK"
          "UkK3r4o/GtFYzPyHNU32J3uqzja7bu6A6uJ20yBYLc+EcJXBWvN+B19q/W93Hivy59fYiRsCjjBncwsa+a1xdGIeCIcswukrzc4dw5G+hvGuJ5M4aENuxiTXeVYtyhGosTAZe9fwIDAQAB" )  ; ----- DKIM key mail for allysmith.uk
Add the DNS TXT record to your domain. My server is hosted with Linode and I use their DNS manager, so I didn’t use the file directly but copied and pasted the details into that instead.
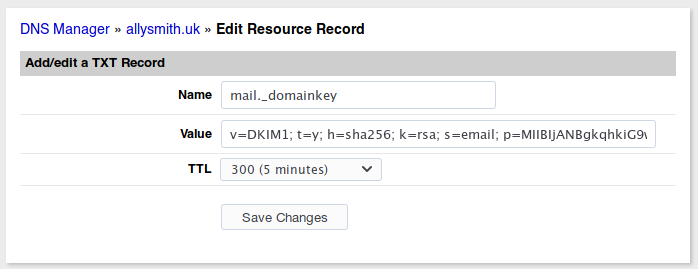
I recommend setting a low TTL for now so that you can make any changes quickly if necessary. Repeat for each domain.
You can test to see when the record is live and if it looks valid using various online tools like MXToolbox.
Configuring OpenDKIM
You will now configure OpenDKIM to use these keys. Create and edit the following configuration files.
KeyTable
List each key that you want to use, on a separate line in the key table file. Provide a name for the key followed by a space and then separated by colons: the domain name, selector, and path to the key.
File: /etc/opendkim/keytable
mailkey allysmith.uk:mail:/etc/dkimkeys/mail.privateIn my key table file above those values were:
| Name | mailkey |
|---|---|
| Domain | allysmith.uk |
| Selector | |
| Key path | /etc/dkimkeys/mail.private |
SigningTable
Specify which key should be used to sign email from each sender. Write each entry on a separate line. Provide the email address followed by a space and then the name of the key to be used from the key table. You can also use an asterisk as a wildcard create a pattern which will match multiple email addresses.
File: /etc/opendkim/signingtable
*@allysmith.uk mailkeyIn my file above I am matching any email address at allysmith.uk. If you use a pattern in the signing table then you’ll need to let opendkim know you're using this format, by prefixing the path with refile: in the main configuration file.
Main configuration
The Debian package provides a documented example of the main configuration file: opendkim.conf. You need to add the paths to your key table and signing table files to this. I have picked out the important lines that should be included.
File: /etc/opendkim.conf
Syslog              yes
UMask               007

KeyTable            /etc/opendkim/keytable
SigningTable        refile:/etc/opendkim/signingtable

Socket              local:/var/run/opendkim/opendkim.sock
PidFile             /var/run/opendkim/opendkim.pid

OversignHeaders     From

TrustAnchorFile     /usr/share/dns/root.key

UserID              opendkim
Testing the configuration
It is a good idea to test the OpenDKIM configuration so far, before we move on to Postfix.
systemctl restart opendkim
opendkim-testkey -d allysmith.uk -s mail -vvv
opendkim-testkey: using default configfile /etc/opendkim.conf
opendkim-testkey: checking key 'mail._domainkey.allysmith.uk'
opendkim-testkey: key not secure
opendkim-testkey: key OK
The result should be that the key is OK. The line key not secure only means that DNSSEC is not being used on the domain, it doesn’t indicate any problem with the key.
Configuring Postfix
You now need to configure Postfix and OpenDKIM to communicate with each other. Most guides seem to favour using a TCP/IP port but as both are running on the same server, I am going to describe using a UNIX socket instead.
OpenDKIM
The default opendkim configuration already creates a UNIX socket; however, Postfix cannot access it from the confines of its chroot jail. Change the socket path to be within the Postfix chroot jail.
File extract: /etc/opendkim.conf
#Socket              local:/var/run/opendkim/opendkim.sock
Socket              local:/var/spool/postfix/var/run/opendkim/opendkim.sock
Now make sure this directory exists and give the opendkim group read and write permissions. Note that I have changed the working directory.
mkdir -p /var/spool/postfix/var/run/opendkim/
cd /var/spool/postfix/var/run/
chgrp opendkim opendkim/
chmod g=rwx opendkim/
ls -l opendkim/
drwxrwx--- 2 root opendkim 4096 Mar  1 14:23 opendkim
drwx--x--- 2 root sasl     4096 Jan 21  2012 saslauthd
Restart opendkim and it will create the new socket file.
systemctl restart opendkim
ls -l opendkim
srwxrwx--- 1 opendkim opendkim 0 Mar  1 14:31 opendkim.sock
Now add postfix to the opendkim group so that it has access to the socket file too.
adduser postfix opendkim
Adding user `postfix' to group `opendkim' ...
Adding user postfix to group opendkim
Done.
Postfix
You need to configure Postfix to use OpenDKIM as a milter (mail filter). Add the following to the main Postfix configuration file. The milter paths are relative to Postfix’s chroot jail.
File extract: /etc/postfix/main.cf
milter_default_action = accept
smtpd_milters = unix:/var/run/opendkim/opendkim.sock
non_smtpd_milters = unix:/var/run/opendkim/opendkim.sock
Reload Postfix’s configuration.
systemctl reload postfix
Use an online service to check if your emails are being signed with the key e.g. send an email to check-auth@verifier.port25.com. When you are happy that everything is working correctly, remove the t=y testing flag from your DNS TXT record.
Comments
Matthew Penfold
Thanks for this. It is well explained and did the job!
Adam S.
It did not =/
Alasdair Smith
Perhaps opendkim was unable to create the socket file. Running
journalctl -u opendkim.serviceto see the log might give you a hint.I would double check that the path is correct and that the opendkim group has read and write access to the folder.
Adam S
Just popping back to say that it was indeed a bad path.
Thanks for the guidance. These instructions work perfectly.
Bob B
Thanks for the tutorial work great on Raspberry OS Debian Buster. I did have to make one alteration from what you had posted.
smtpd_milters = unix:/var/spool/postfix/var/run/opendkim/opendkim.sock non_smtpd_milters = unix:/var/spool/postfix/var/run/opendkim/opendkim.sock
Thanks Again Bob